2-2 Setting up an environment to try in Google Colab(Stable Diffusion Practical Guide Table of Contents)
List
Shortcut to how to install Stable Diffusion PC.
2-2 Setting up an environment using Google Colab
We will introduce how to set up an environment using
Stable Diffusion in Google Colab. We will also learn how to use Colab
which allows you to easily utilize a powerful Python environment.
>>>What is AUTOMATIC1111/stable-diffusion-webui?
GitHub - AUTOMATIC111/stable-diffusion-webui
https://github.com/automatic1111/stable-diffusion-webui
>>> Sign up for Google Colab’s paid plan
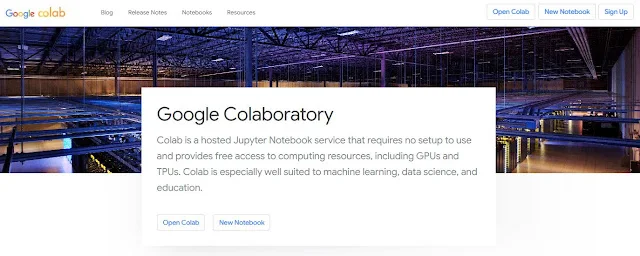
The official name of Google Colab is Google Colaboratory,
and it is a service provided by Google Research.
If you have a Google account that can use Google Drive,
you can basically use it for free. Colab is a Python environment built on
a browser that can run programs, so it is very suitable for machine learning,
data analysis, education, etc.
If your PC specifications are not sufficient or you want to
create images more comfortably,
you can use Stable Diffusion using Google Colab.
Google Colaboratory/ Choose the Colab plan that suits you.
https://colab.research.google.com/signup?authuser=2

>>>Run Stable Diffusion in Google Colab.
GitHub - aicuai/Artist-Guide-for-SDXL
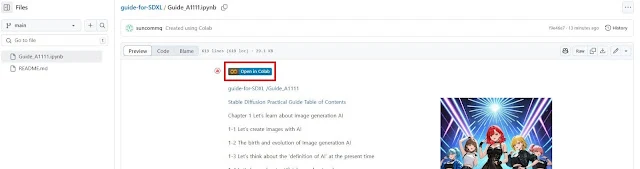
ⓐClick the Preview-Open in Colab link to open the Colab notebook.
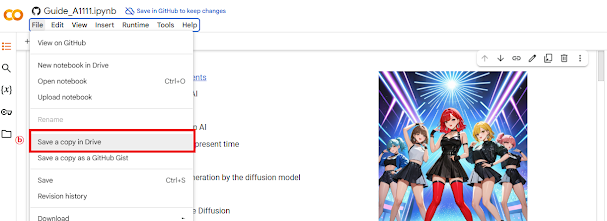
ⓑGo to your Colab notebook and select File - Copy to Drive to work on your drive.
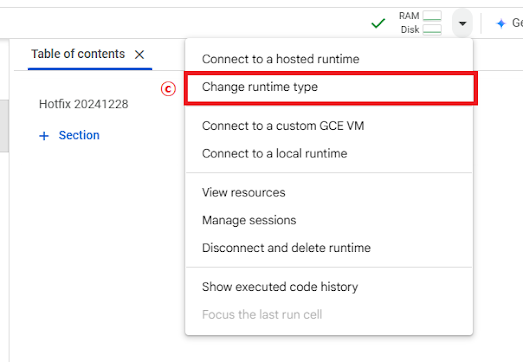
ⓒ Select Runtime Type: Python 3, Hardware Accelerator: T4 GPU and click ‘Save’.
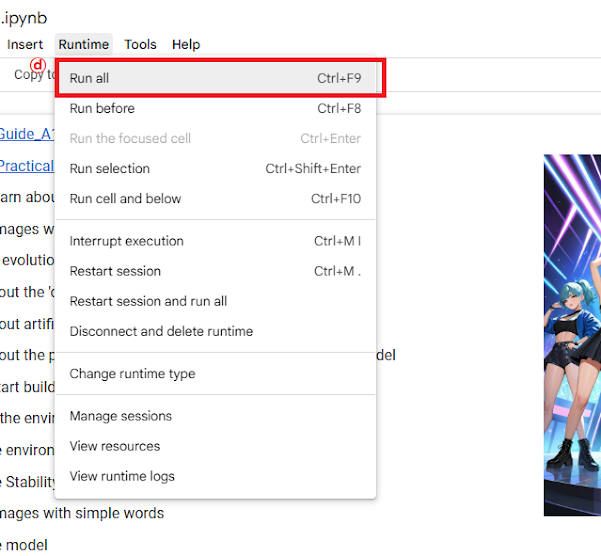
ⓓFrom the menu above, select Runtime -> Run all.In the following message window, select Allow All and log in to Googledrive. The code cell will run and the model will be downloaded.
This may take some time, so please wait patiently.
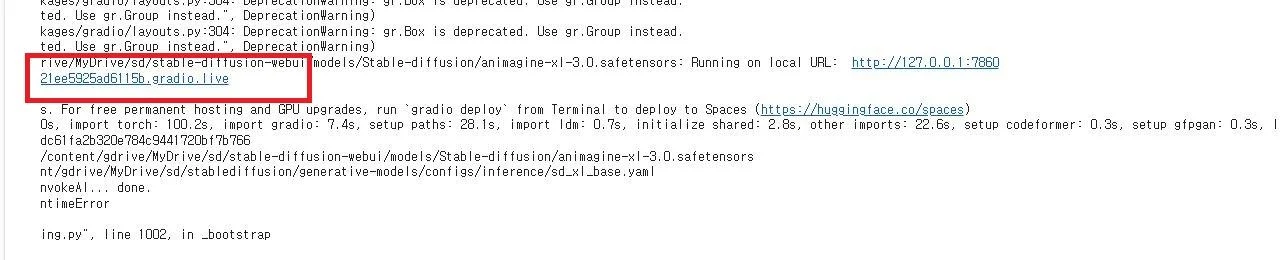
After all the codes are executed successfully,
at the very end, you will see a URL called Running on
public URL : https://xxxxxxx.gradio.live ,
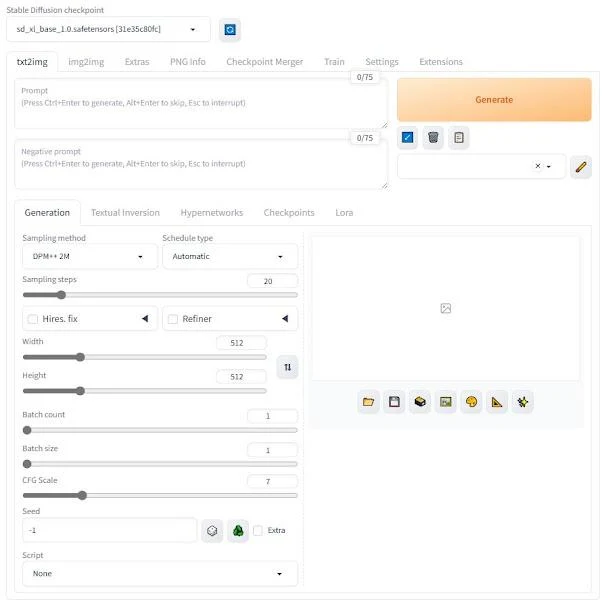
and clicking on it will run the stable diffusion in a new tab.
Comments
Post a Comment